Wednesday, January 30, 2013

A ladle from the back yard

Laughter asked for pictures of the scoop that was pictured in the cedar utensil holder that I posted a few days ago.  So I took some pictures.  We can't figure out how to get good pictures out of our camera, so I will substitute quantity for quality.


This little ladle was made from a limb with a smaller branch coming off of it.  It came from the Arizona Sycamore in our back yard.  It was loads of fun to make.  You can see the blemishes in the wood.  Those don't bother me too much.  What bothers me more is the way the wood does not stay smooth after it gets wet and how it feels like it has never been oiled even though I oiled it thoroughly many times.  But, as I complained to Laughter about the wood, he reminded me that it isn't maple.  And I think that sums it up.  Sycamore is pretty decent wood, but it isn't maple.  Not as stable, not as smooth, not as good for kitchen utensils.

Thursday, January 24, 2013

Another Christmas photo

The pictures below show all the utensils I made for my wife for Christmas (and in the weeks before Christmas).  The wooden holder is what the kids made for her for Christmas.  It is made of aromatic cedar.


Sunday, January 20, 2013

"Perfect" spoons update

Here are the next two steps of the perfect cooking spoons.  After I rough-shape it with the disc sander, I like to very quickly go over my spoons with my electric hand sander with 120 grit paper.  Now, you may be thinking, "Why is he sanding it before the shaping is done?  Doesn't he still need to do the knife work?  And why would he start with 120 grit?"  Excellent questions.  The answer is that I am not actually sanding it yet.  I like to give it a once-over with the electric sander at this point because it takes the rough edges off and thus exposes all of the weirdness in the piece.  Once I take off the edges this way, it is a lot easier to see where I need to remove lots of material and where I need to smooth a little or curve a little or straighten a little.  It speeds up the finishing work considerably.
So, here are some pictures of the bowls sanded down with 80 grit paper and the outsides sanded a little with the electric sander and 120 grit. 


Now I am ready to mark them up with a pencil and go at them with my x-acto knives and more 80 grit sandpaper.

An unlikely cooking spoon

These have become the most used cooking spoons in the kitchen. I say it is unlikely, because they were made for the sole purpose of reaching the last bit of peanut butter or miracle whip in the bottom of the jar, without soiling hands in the process. And, they are not spoons. But, they are thin and light and plentiful. It turns out they are really good for stirring sauces, and the point is perfect for reaching into corners of saucepans while the heat is on, and scraping it all out when it is done. They are not any good at serving, although we have tried (it keeps portions small).
These are also easy projects, as you may imagine. Some of these are made of cherry, and I made some others of maple, but most are made from 1/4 inch thick poplar straight from the home store.

Saturday, January 19, 2013

the perfect cooking spoon?

I have thought a lot about the perfect shape for a cooking spoon.  So, imagine my delight when I was reading Robin Wood's blog and came upon his post about the perfect cooking spoon.  He says that it "is neither rounded for flat across the end, it is a gentle curve and cut at an angle either right of left handed. This allows you to sweep around the base of the pan efficiently. The end should be robust enough to scrape scrambled eggs as they begin to thicken but thin enough to easily cut into food when serving."  Here is his picture of some of them:
I decided to try it.  This morning I went out and cut out some spoons with his description and picture in mind.  Here they are after being cut out on the scroll saw and then shaped a bit on the disc sander.


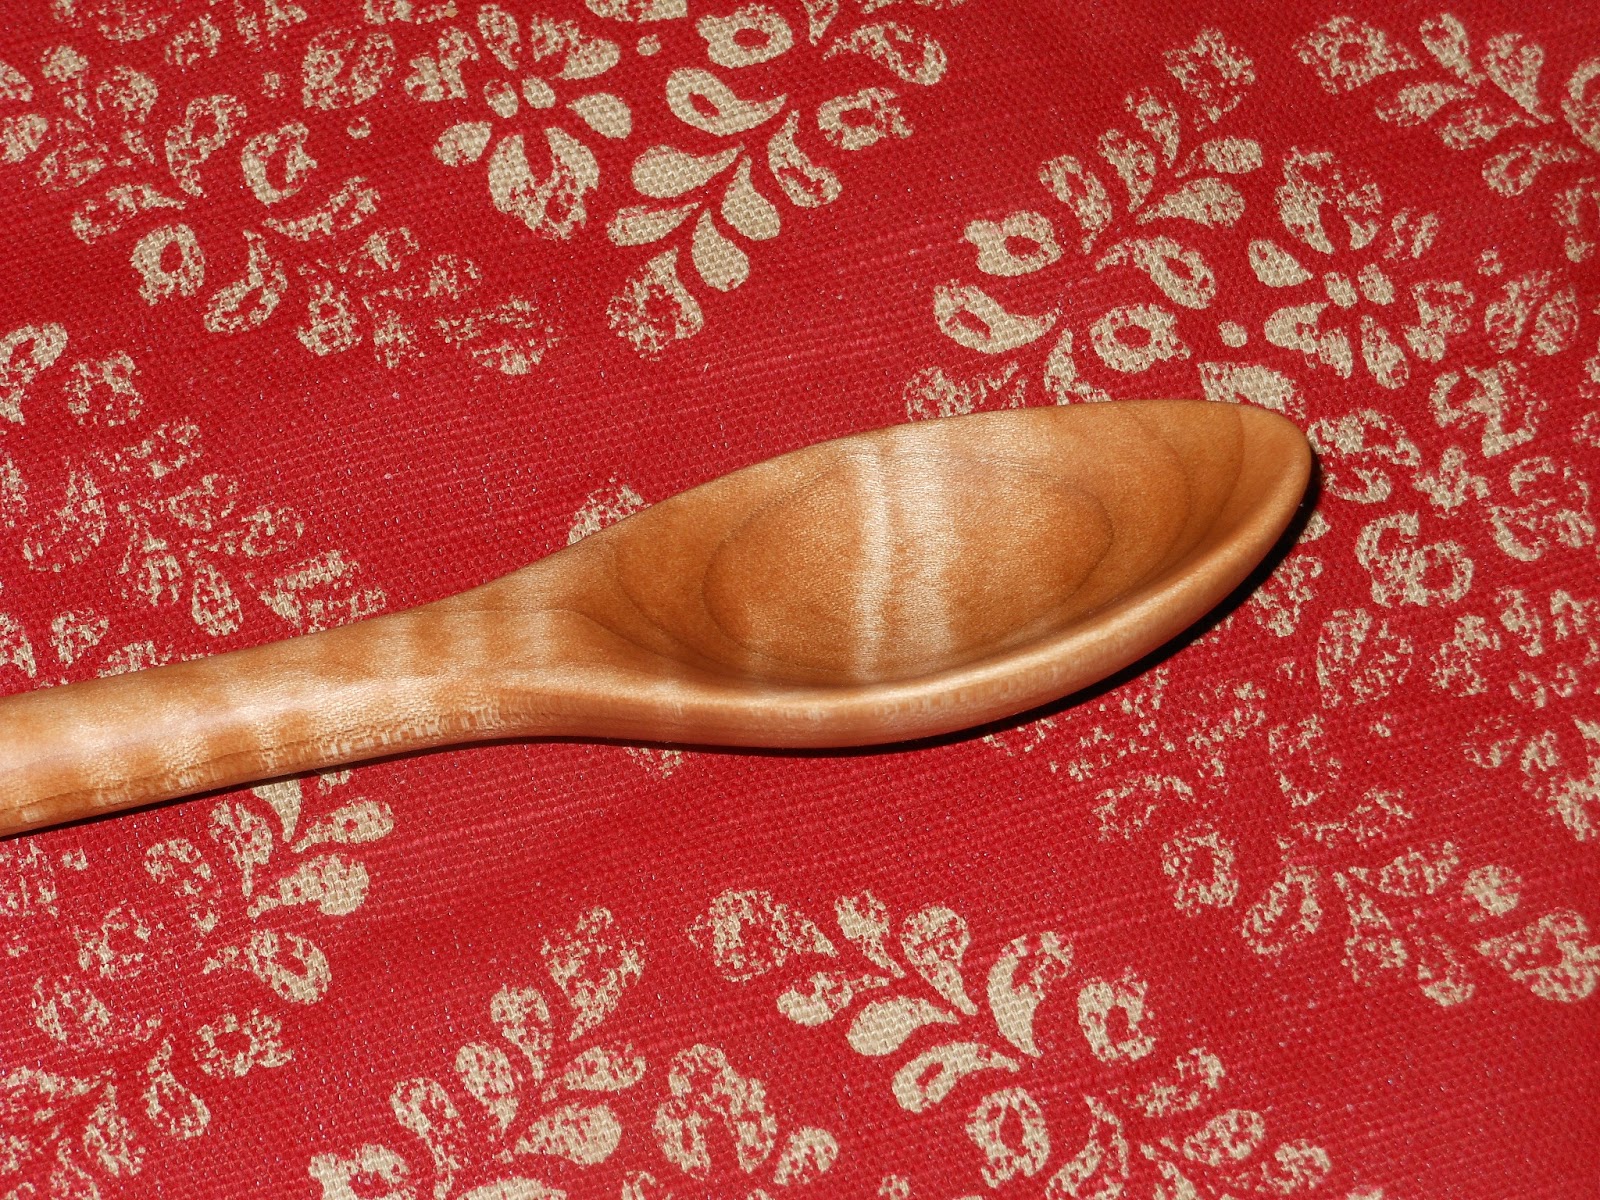
After that I gouged out the bowls of the spoons.  Lesson learned from that: gouge the bowls before shaping the back of the bowl.  This is the first time I have shaped the back and handle before gouging out the bowl.  It made it a LOT harder to use my mallet, because the piece wouldn't sit still very nicely.  So it will also be the last time I do it in that order.
Here are the gouged bowls.

I'll post a picture of them when they're done.  And then we will see how perfect they are.

Monday, January 14, 2013

More wooden utensils from Christmas

Here is what I made for my little sister.


Here you have three views of the same thing.  On the left, we have a butter spreader made of bloodwood.  Very pretty.  Bloodwood is very hard and makes pink sawdust.  Next we have another walnut spoon.  Walnut is kind of splintery and needs a TON of sanding.  The third item is a maple spatula.  It is hard to see from the picture how thin I made it.  I wanted it to be thin enough to use as a pancake flipper but still be strong enough to last for decades.  The last item is a walnut butter spreader.

Now, what you can't see in the pictures is how beautiful the bloodwood is.  It polishes to a nice shiny deep red.  The main problem is that it likes to burn up saw blades on the scrollsaw.

Saturday, January 12, 2013

one of my favorite new spoons

I have been making a lot of spoons lately.  I got a lot of old maple at my local used building supply store, and maple makes good spoons.  Here is one of my favorite new ones.


I know, it's not terribly exciting to look at.  It's slightly shorter than most spoons - I had a scrap that was an inch shorter than my other spoons.  I didn't make a pattern for it.  I just sort of scribbled on the wood and then cut it out.  That's why the handle is slightly off center, and that's part of its charm.  I just like the soft curves of it.  It's not a gorgeous supermodel spoon.  It's a nice-looking friendly spoon.  From the bottom picture you can see how I cut the top of the bowl of the spoon down a little so it isn't just flat the whole way.  I learned that from Wille Sundqvist and his son Jogge.  Not that this spoon compares at all with what they make, but it is nicer than having a continuous flat surface.

Friday, January 11, 2013

A new spoon (or two)


So, the other day I found a very interesting-looking spoon on the internet.   Here are the pictures of it:


An unusual shape, and I'm not sure about the utility of it, with the low sides that reduce the bowl's volume, but it looks way cool.  So I decided to try it.

Here is what I made:


You can see that the bowl of my spoon does not have sides quite as low as the idea spoon.  I haven't used it yet, but it is so pretty to look at.

Here is my second version of it.  It is more practical than the first version because the bowl is wider and thicker and doesn't dip down on the sides.


I will post something later about the handle of this one.

Wooden Spoons and other utensils from Christmas 2012!

Now that everyone has gotten their Christmas presents, I can post pictures of what I made for people.  Today I am posting pictures of what I made for my sister-in-law.  Here are two different angles.  There are two butter knives, one made of maple and the other of walnut.  Then there is a maple stirrer.  Laughter gave me one a couple years back and we love using it for stirring soup and mixing batter.  It is a very useful tool.  Then, of course, is the main event - the walnut spoon.  That baby is beautiful.  You can see some if its beauty in the pictures, but my camera doesn't do it justice.  It has a nice deep bowl, a slightly tapered handle...  It is a joy to hold.  At least I think so.  I will have to find out how my sister-in-law likes them after she has used them for a few months.